
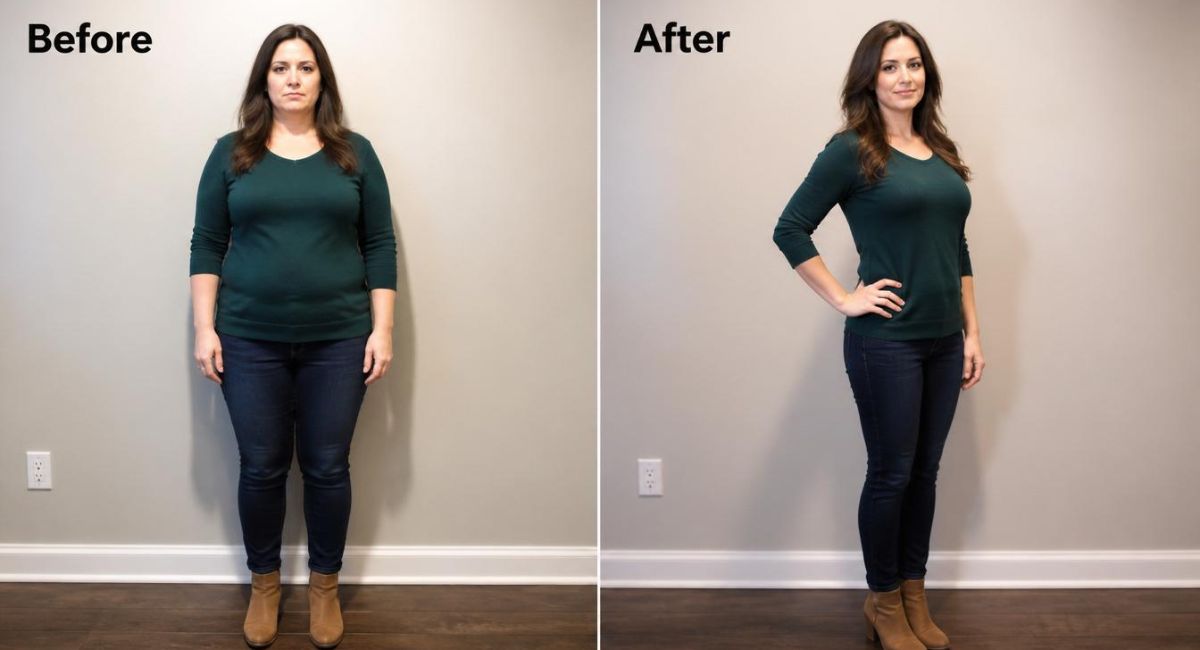
You do not need to lose weight for your family photos. Professional photographers use seven specific posing tricks that instantly create a slimmer appearance. These techniques manipulate light, angle, and body position to elongate your silhouette and minimize perceived width. No editing software required.
The camera flattens three-dimensional bodies into two-dimensional images. This flattening effect naturally makes everyone appear wider than they look in real life. The solution is not weight loss but strategic posing that works with the camera’s limitations rather than against them. According to the Professional Photographers of America , subjects who learn these seven tricks rate their photo satisfaction significantly higher than those who show up without preparation. For complementary color strategies that enhance these posing techniques, Explore:
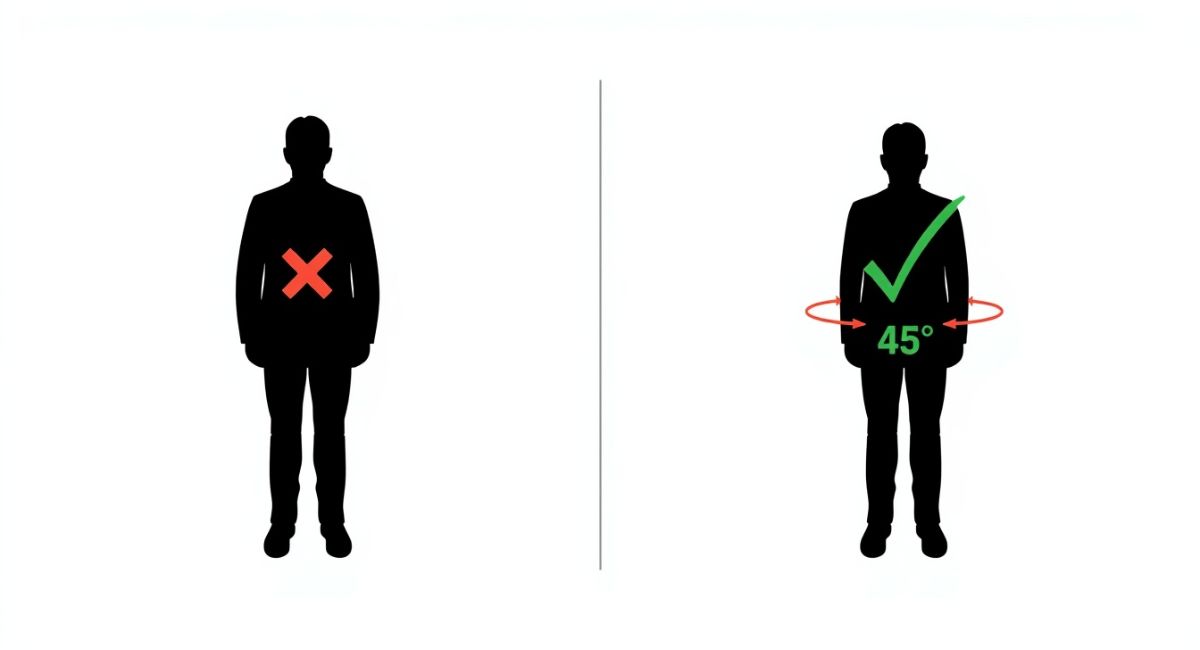
1. Turn Your Body 45 Degrees Away From the Camera
Facing the camera straight on makes everyone look wider. The camera sees your full width from shoulder to shoulder and hip to hip. Turning 45 degrees reduces that visible width by nearly half while still keeping your face pointed toward the lens.
Place your front foot pointing at the camera. Put your back foot perpendicular. Shift 70% of your weight onto your back foot. This position creates a natural S-curve in your spine that elongates your torso and slims your waist.
Keep your shoulders turned slightly less than your hips. This twist creates a dynamic line from your shoulders down to your waist. The camera reads this line as length rather than width. The difference between facing straight on and turning 45 degrees can make you look ten pounds lighter instantly.
For full-body posing that complements this technique, read:
The 45-Degree Transformation
| Body Position | Visual Result |
|---|---|
| Facing straight on | Full width visible, blocky silhouette |
| 45-degree turn | Reduced visible width, elongated lines |
| Weight on back foot | S-curve spine, natural waist definition |
2. Create Space Between Your Arms and Body
Pressed arms look wider. When you squeeze your arms against your torso, the camera sees one solid block from shoulder to hip. Creating a small gap separates your arm from your body and instantly creates definition.
Put your hand on your hip. Let your elbow bend naturally. The gap between your arm and ribcage allows light to pass through, creating shadow that defines your waist. This small space makes your upper body appear narrower.
For group photos, avoid letting arms press against the person next to you. Leave two to three inches of breathing room between family members. Those small gaps add up to a more dimensional, less crowded final image where everyone looks individually slimmer.
Learn how intentional hand placement transforms your photos in:
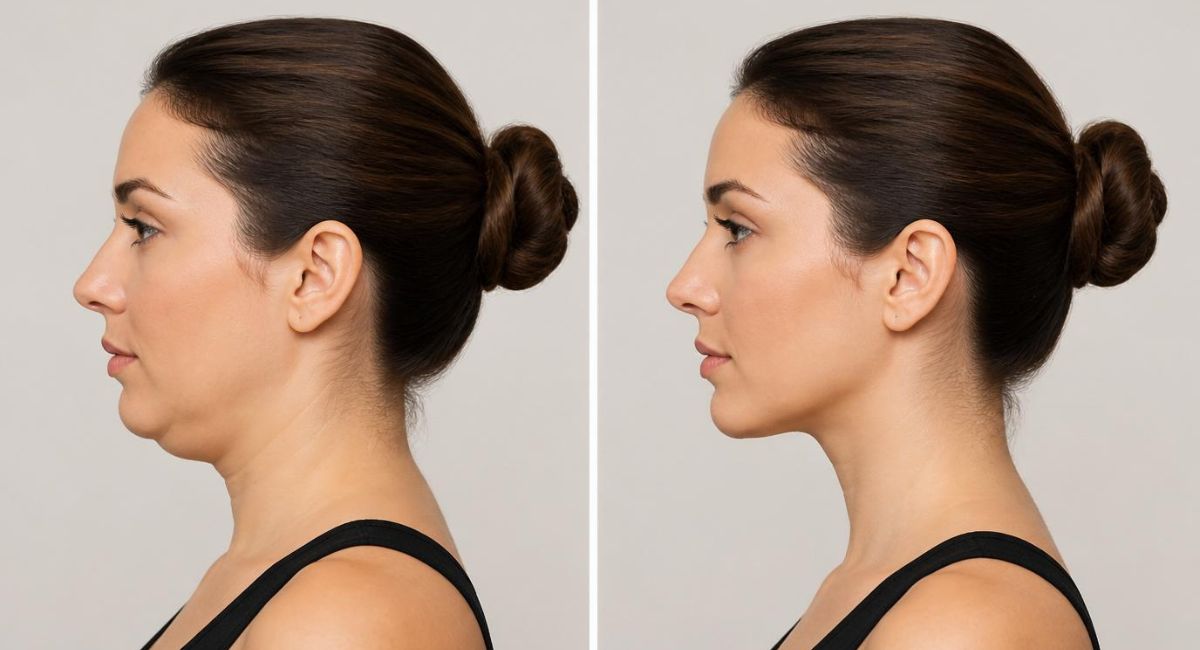
3. Push Your Face Slightly Forward and Down
Most people pull their head back when a camera appears. This creates double chins and makes the neck look short. The fix is counterintuitive but works instantly.
Push your face slightly forward and down toward the camera. Imagine a string pulling the top of your head up and forward. Your ears should align behind your shoulders rather than in front. This stretches the neck and defines the jawline.
Drop your chin slightly but keep your eyes looking up at the lens. This angle eliminates shadows under the chin and creates a more flattering jawline. Practice this in the mirror before your session. The movement feels strange but looks natural on camera.
Discover why some people naturally excel at this technique in:
4. Stand Behind Something or Someone
Strategic layering creates instant slimming. Standing partially behind another person or an object blocks the widest parts of your body from the camera’s view.
Position children or shorter family members in front of you. Their bodies naturally cover your lower torso and hips. The camera sees their smaller frames and your upper body, creating a layered composition where everyone looks proportioned.
Use props as natural blockers. A bouquet of flowers, a seated child on your lap, or a well-placed chair arm can hide areas you prefer not to emphasize. Even a hand placed casually on your hip creates a visual break that slims your silhouette.
For group posing strategies that incorporate layering, explore:
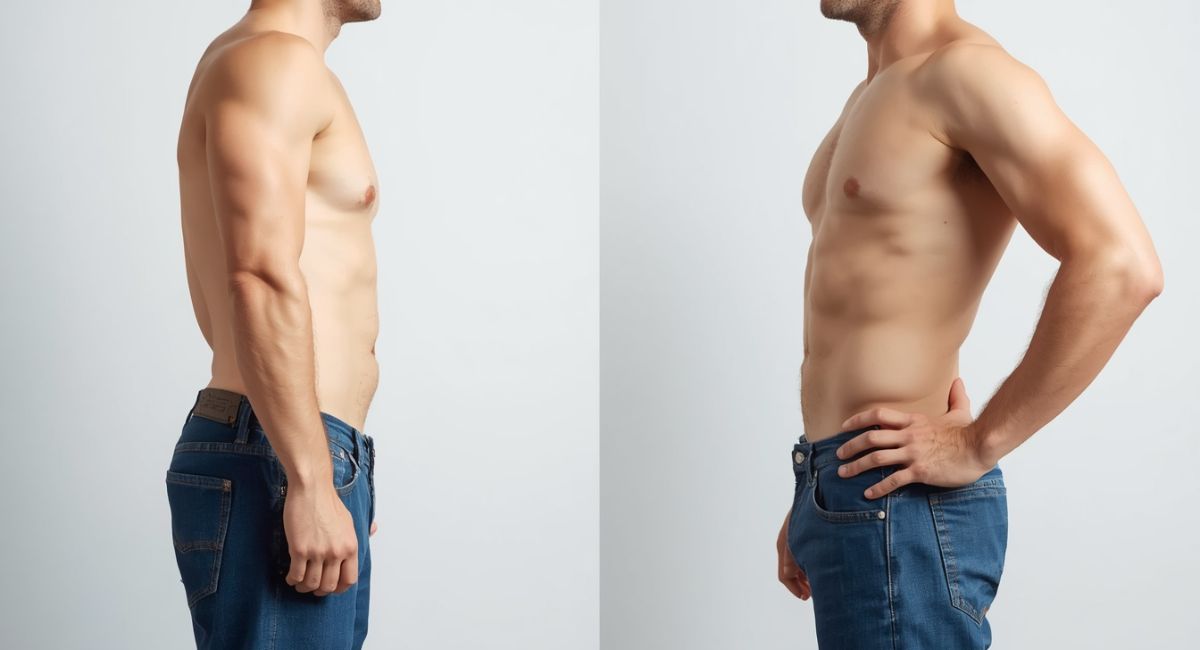
5. Lengthen Your Spine and Engage Your Core
Slouching adds perceived weight. Standing tall elongates your entire silhouette. The difference between slumped shoulders and an engaged core can make you appear inches taller and pounds lighter.
Imagine a string pulling the crown of your head toward the ceiling. Let your shoulders relax down and back. This posture opens your chest and creates length from your neck to your waist.
Engage your core slightly as you would during normal exercise. Do not suck in your stomach. That creates unnatural tension in your face and shoulders. A gentle core engagement keeps your torso lifted without the strained look of holding your breath.
Standing tall also improves how your clothing drapes. Fabric hangs more cleanly over an elongated frame. Wrinkles and folds become less visible. For more slimming posture tips, read:
6. Angle Your Hands and Feet Strategically
Where you point your extremities affects how the camera reads your entire body. Angled hands and feet create diagonal lines that the eye follows. Straight lines create width.
Point your toes toward the camera rather than perpendicular. This elongates your legs and makes your feet appear smaller. Never stand with feet perfectly parallel. That stance widens your lower body visually.
Turn your palms slightly toward the camera rather than showing the backs of your hands. The hand’s width appears narrower when viewed from the side. Angled hands also create more interesting shapes than flat hands.
Avoid pointing fingers directly at the camera. That foreshortens your hand and makes fingers look stubby. Let fingers relax naturally with soft bends at each knuckle.
For detailed hand and foot posing guidance, explore:
- Engagement Photo Outfits: Stunning Couples Guide for Picture-Perfect Memories
- Senior Picture Ideas 2026: Outfits Poses and Locations That Wow
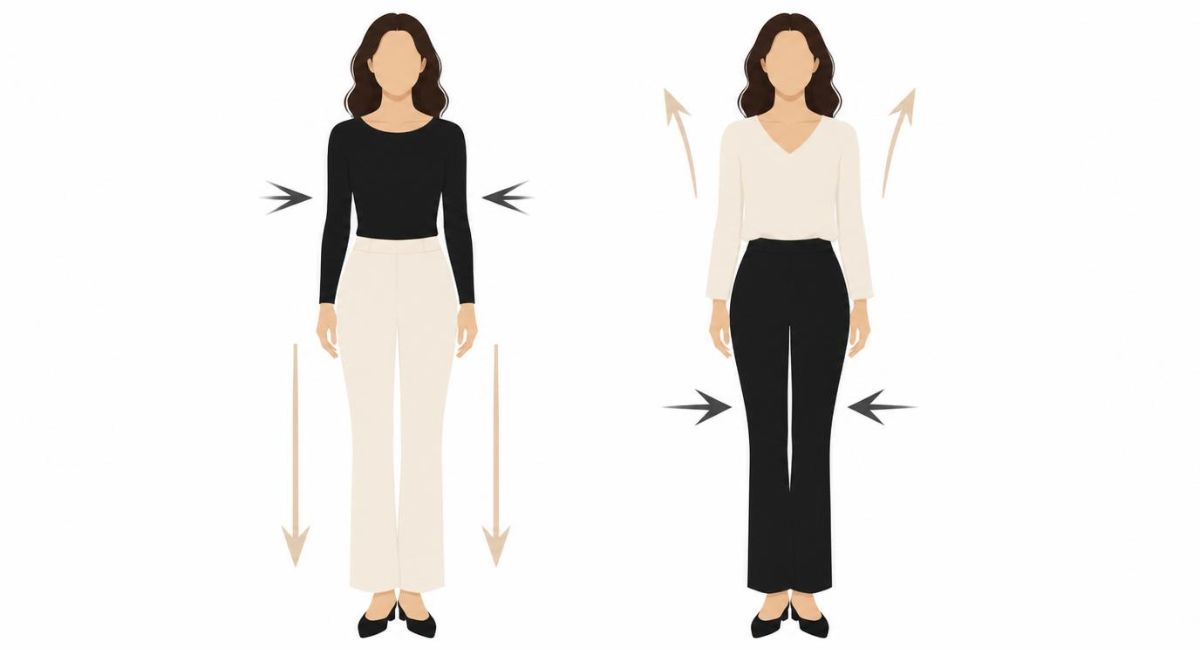
7. Wear Dark Colors on the Areas You Want to Minimize
Color placement matters as much as body positioning. Dark colors absorb light and reduce perceived size. Lighter colors reflect light and add perceived volume. Use this principle strategically.
Wear navy, charcoal, or black on your widest areas. If you carry weight in your hips, wear dark bottoms. If you worry about your midsection, wear a dark top. The dark color visually compresses those areas.
Wear lighter colors where you want to draw attention. A cream top draws the eye upward toward your face. White pants make legs appear longer and leaner when paired with a dark top.
Use monochromatic dark outfits for the strongest slimming effect. Head to toe navy or head to toe charcoal creates one uninterrupted vertical line. The eye travels top to bottom rather than side to side, making you appear taller and narrower.
Discover related articles:
8. Quick Reference: 7 Slimming Posing Tricks
| # | Trick | One-Sentence Summary |
|---|---|---|
| 1 | Turn 45 degrees | Face angled away from camera, feet pointing at lens |
| 2 | Create arm space | Hands on hips, gaps between arms and body |
| 3 | Push face forward | Chin slightly down and forward to define jawline |
| 4 | Stand behind someone | Use children or props as natural blockers |
| 5 | Lengthen spine | Stand tall, engage core without sucking in |
| 6 | Angle extremities | Point toes forward, turn palms toward camera |
| 7 | Wear dark colors | Dark on wide areas, light on areas to emphasize |
9. Combining These Tricks for Maximum Effect
For individual portraits: Turn 45 degrees. Push your face forward. Put your hand on your hip. Wear navy from head to toe. Lengthen your spine. Point your front foot toward the camera.
For couples: Stand slightly behind your partner rather than side by side. Turn your bodies toward each other at 45-degree angles. Each person puts one hand on their own hip and the other hand on their partner’s back or waist.
For family groups: Arrange people by height with tallest in back center. Shorter people on sides and children in front. Everyone turns 45 degrees toward the center. Dark colors on adults. Lighter colors on children to draw the eye upward.
For seasonal applications of these posing tricks, explore:
- Spring Family Photo Outfits 2026: Fresh Stylish Ideas for Blooming Portraits
- Summer Family Photo Outfits: Light & Airy Styles That Photograph Beautifully (2026)
- Fall Family Photos: Stylish Outfit Ideas That Look Stunning & Elegant
- Winter Family Photo Outfits: Cozy Elegant Looks That Keep You Warm and Photogenic
10. The Bottom Line
Looking thinner in family photos requires seven specific posing tricks. Turn your body 45 degrees. Create space between your arms and body. Push your face slightly forward and down. Stand behind someone or something. Lengthen your spine and engage your core. Angle your hands and feet strategically. Wear dark colors on areas you want to minimize. Practice these before your session. They work instantly. No weight loss required.