
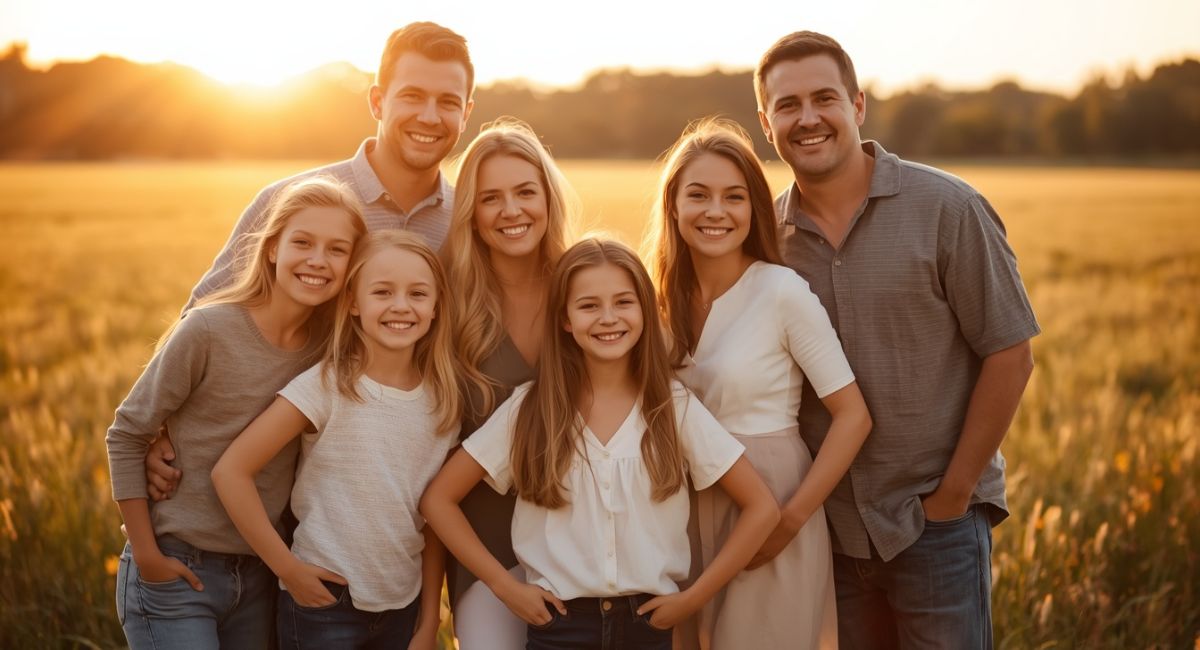
Looking good in family photos has almost nothing to do with how you look in real life. Professional photographers use specific techniques that transform awkward subjects into confident, natural-looking people. These 12 secrets work for every body type, age group, and family size.
The difference between a bad family photo and a great one usually comes down to small adjustments. Chin position. Shoulder angle. Hand placement. Where you look. These micro-movements take practice but become automatic after a single session. According to the Professional Photographers of America , families who prepare with specific posing techniques rate their photo satisfaction 73% higher than those who show up without guidance. For foundational posing skills, Explore:
1. Push Your Face Slightly Forward
Most people tuck their chin down or pull their head back. This creates double chins and makes the neck look short. The fix is counterintuitive but works instantly. Push your face slightly forward and down toward the camera.
Imagine a string pulling the top of your head up and forward. Your ears should align behind your shoulders rather than in front. This stretches the neck and defines the jawline. A slight forward head position eliminates shadows under the chin and creates a more flattering angle for every face shape.
Practice this in the mirror before your session. The movement feels strange but looks natural on camera. For more facial posing tips, read:
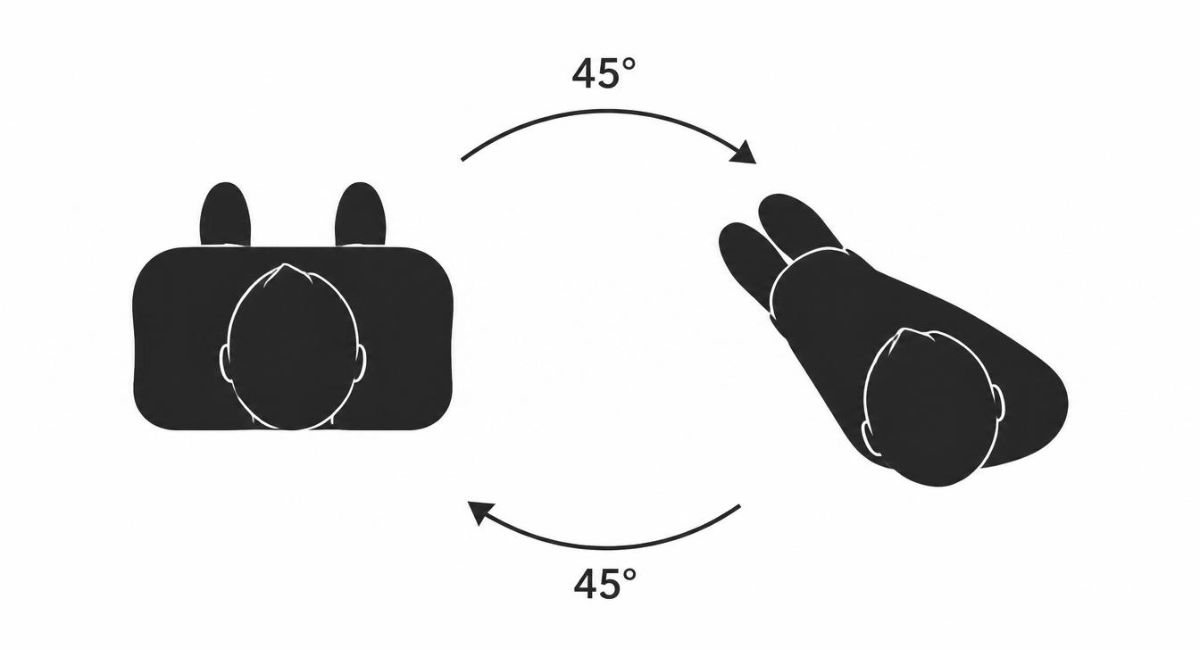
2. Angle Your Body 45 Degrees
Facing the camera straight on makes everyone look wider. The camera flattens three-dimensional bodies into two-dimensional shapes. Angling your body solves this problem immediately.
Turn your body 45 degrees away from the camera. Put your front foot pointing toward the camera. Place your back foot perpendicular. Shift your weight onto your back foot. This position slims every body type and creates natural leading lines that draw the eye up toward your face.
The 45-degree rule applies to every family member regardless of size or age. Children look more natural. Adults look slimmer. Grandparents look more comfortable.
Learn full-body posing in:
The 45-Degree Checklist
| Body Part | Position |
|---|---|
| Feet | Front foot pointing at camera, back foot perpendicular |
| Weight | Shifted onto back foot |
| Hips | Turned 45 degrees away |
| Shoulders | Turned slightly less than hips |
| Face | Turned back toward camera |
3. Create Space Between Your Arm and Body
Pressed arms look wider. When you squeeze your arms against your torso, the camera sees one solid block from shoulder to hip. Creating a small gap separates your arm from your body and instantly slims your appearance.
Put your hand on your hip. Bend your elbow slightly. Let light pass through the gap between your arm and ribcage. This small space creates definition and makes your waist appear narrower.
For group photos, avoid letting arms press against the person next to you. Leave two to three inches of breathing room between family members. Those small gaps add up to a more dimensional, less crowded final image. Explore group posing in:
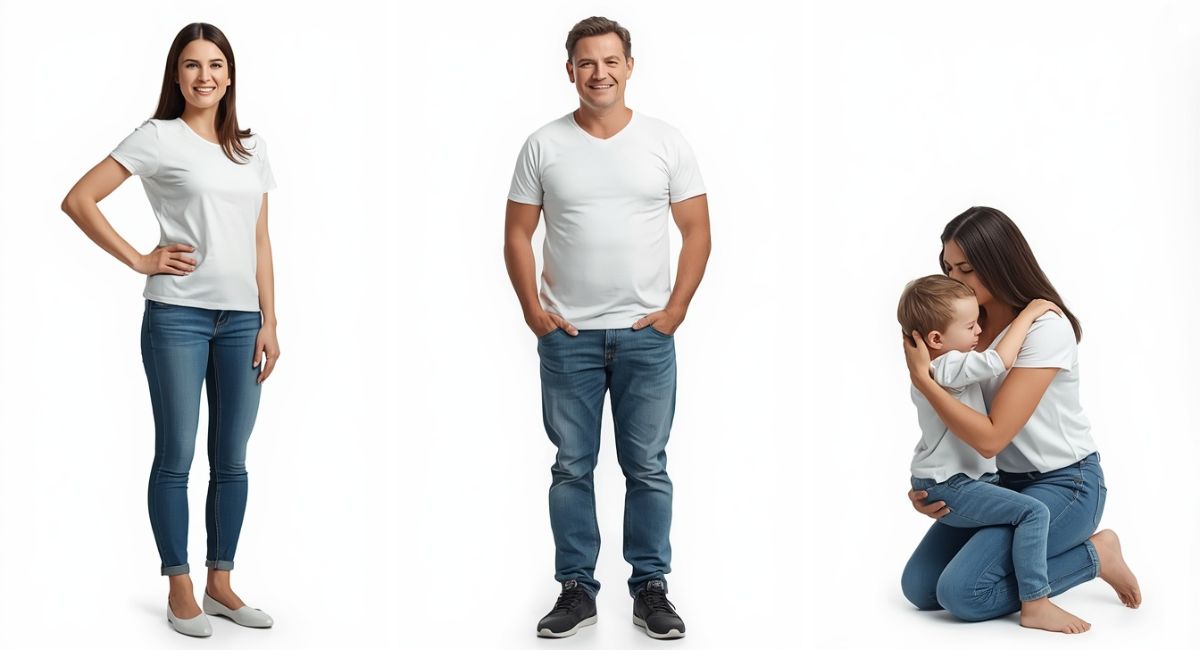
4. Put Your Hands Somewhere Intentional
Awkward hands ruin otherwise great photos. People either let hands hang lifelessly (which looks uncomfortable) or hide them behind backs (which looks secretive). The solution is giving your hands a specific job.
One hand on your hip. One hand holding something (a coffee cup, a child’s hand, a bouquet). Both hands in your pockets with thumbs out. One hand touching your collar or necklace. Hands clasped loosely in front of your waist.
Never let hands hang straight down. Never hide them completely. The intentional hand placement rule applies to every family member. Men look natural with hands in pockets. Women look elegant with one hand on a hip. Children look cute holding a parent’s hand or a small prop.
Find more posing ideas in:
- Engagement Photo Outfits: Stunning Couples Guide for Picture-Perfect Memories
- Senior Picture Ideas 2026: Outfits Poses and Locations That Wow
5. Look at the Lens Not the Photographer
This sounds obvious but trips up many people. When a photographer talks, your natural instinct is to look at their face. Their camera sits next to their face but not exactly on it. Looking at the photographer’s face makes your eyes appear slightly off-camera in the final image.
Stare directly at the dark circle of the lens. Ignore the photographer’s eyes and mouth. Pretend you are looking through the lens at your own reflection. This creates direct eye contact with anyone who views the photo.
For candid shots, look at another family member’s eyes instead of the camera. Genuine connection between family members photographs better than posed smiles to camera. Mix direct looks with connection looks throughout your session.
Perfect your camera connection with:
6. Smile With Your Eyes Not Just Your Mouth
A mouth-only smile looks forced and uncomfortable. A genuine smile reaches the eyes. The technical term is a Duchenne smile named after the French neurologist who studied facial expressions.
Think of something genuinely happy. Your child’s laugh. A good memory from that morning. The fact that photos will end soon. This real emotion reaches your eyes and creates small crow’s feet at the outer corners.
Squint slightly. Not a full squint but a soft narrowing of the eyes. This mimics the natural eye shape of a genuine smile. Practice in a mirror until you can activate your eye smile on command.
The question how to look good in a family photo always comes back to authentic expression. Forced smiles look forced. Real smiles look real. Learn more facial expression techniques in:
7. Stand on One Slightly Bent Knee for Lower Angles
Low angles make people look powerful. High angles make people look vulnerable. Family photos work best with the camera at chest height shooting slightly down. But the subject’s stance matters just as much.
Put your weight on your back leg. Bend that knee slightly. Let your front leg relax with a soft bend. This creates a slight S-curve in your body that elongates your silhouette.
Never lock your knees. Locked knees make you look stiff and uncomfortable. A soft bend in both knees creates natural movement and prevents that frozen-in-place look.
For seated poses, sit on the edge of your chair rather than sinking into it. Keep your back straight and lean slightly forward toward the camera. This prevents the slumped look that adds perceived weight. Explore seated posing in:
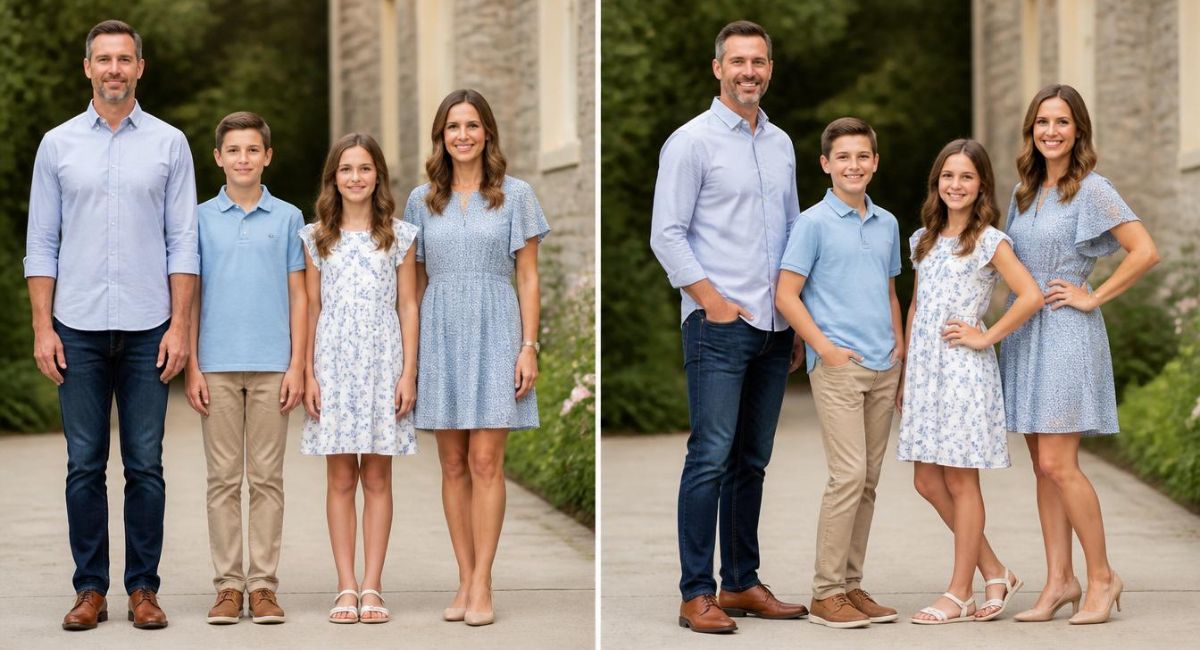
8. Let Your Arms Create Triangles
Triangles are the most pleasing shape in photography. Straight lines look stiff. Triangles look dynamic. You can create triangles with your arms by bending elbows and creating angles.
One hand on hip plus one arm hanging creates a triangle. Both hands on hips creates a triangle. Arms wrapped around a child creates triangles. Hands clasped in front with bent elbows creates a triangle.
The triangle rule applies to group photos too. Position family members so their heads form a triangle shape rather than a straight line. Tallest in back center. Shorter people on sides. Children in front. This pyramid composition looks natural and frames everyone beautifully.
Learn composition techniques in:
9. Breathe Normally
People hold their breath during photos. This creates stiff shoulders, tight necks, and frozen expressions. The solution is simple. Breathe normally.
Take a slow breath in right before the shutter clicks. Let half of it out. This relaxes your shoulders and softens your expression. The slight pause between inhale and exhale creates a natural contemplative look.
Never suck in your stomach. This makes you look uncomfortable and creates unnatural tension in your upper body. Instead, engage your core slightly as you would during normal posture. The camera cannot tell the difference between a sucked-in stomach and a naturally engaged core. But it can see the tension in your face and shoulders.
For more breathing and relaxation techniques, read:
10. Wear What Makes You Comfortable
Uncomfortable clothing shows up in photos. A too-tight collar makes you pull at your neck. Shoes that pinch make you shift your weight awkwardly. Itchy fabric makes you squirm between shots.
Choose outfits you have worn before. Break in new shoes. Wash new shirts to soften the fabric. Sit in your chosen outfit before the session to identify any problem areas.
Layer for flexibility. A cardigan or jacket gives you options. Start with layers on. Remove them as you warm up. Multiple looks from one outfit choice keep the session moving.
The most flattering color question matters but comfort matters more. Explore:
- What Color Is Most Flattering for Photos? (Professional Photographers Reveal the #1 Hue) for color guidance.
- What to Wear for Summer Family Photos: Complete Guide for summer styling guidance.
- Family Photo Outfits: Stunning Timeless Ideas That Work for Every Season for complete wardrobe planning.
11. Trust the Photographer’s Direction
Professional photographers pose hundreds of families per year. They know what works. When they ask you to move your chin, turn your shoulder, or shift your weight, they are not criticizing your appearance. They are applying techniques that work.
Say yes to every request. Even strange ones. “Lean your forehead toward your husband’s cheek.” “Look at your daughter’s nose.” “Pretend you just heard a funny secret.” These odd instructions produce natural results.
Do not apologize for being awkward. Every family feels awkward during photos. The photographer expects this. Your job is to follow directions. Their job is to make you look good.
For seasonal posing variations, explore:
- Spring Family Photo Outfits 2026: Fresh Stylish Ideas for Blooming Portraits
- Summer Family Photo Outfits: Light & Airy Styles That Photograph Beautifully (2026)
- Fall Family Photos: Stylish Outfit Ideas That Look Stunning & Elegant
- Winter Family Photo Outfits: Cozy Elegant Looks That Keep You Warm and Photogenic
12. Stop Trying to Look Perfect
Perfect is boring. Perfect looks posed and artificial. Small imperfections make photos feel real and memorable. A crooked smile. A toddler picking a flower. A teenager rolling their eyes. These moments tell your family’s story.
Let kids be kids. Do not force them to stand still and smile. Let them run between shots. Capture them laughing and playing. The best family photos often happen between posed shots.
Embrace what makes your family unique. Matching outfits and forced smiles look like every other family photo. Your authentic weirdness is what makes your images worth keeping.
The secret to how to look good in a family photo is caring less about looking perfect and more about looking like yourselves. For color and styling that supports authentic photos, read:
13. Quick Reference: 12 Secrets at a Glance
| # | Secret | One-Sentence Summary |
|---|---|---|
| 1 | Push face forward | Stretch your neck and define your jawline |
| 2 | Angle body 45 degrees | Turn sideways to look slimmer |
| 3 | Create arm space | Leave gaps between arms and body |
| 4 | Put hands somewhere | Give hands a specific job |
| 5 | Look at the lens | Stare directly into the glass |
| 6 | Smile with eyes | Activate crow’s feet for genuine expression |
| 7 | Bend one knee | Soften your stance and create an S-curve |
| 8 | Create triangles | Bend elbows to form dynamic shapes |
| 9 | Breathe normally | Never hold your breath or suck in |
| 10 | Wear comfort clothes | Break in everything before the session |
| 11 | Trust the photographer | Follow every strange direction |
| 12 | Stop trying to be perfect | Embrace authentic messy moments |
14. The Bottom Line
Looking good in family photos requires 12 specific techniques. Push your face forward. Angle your body 45 degrees. Create arm space. Give hands a job. Look at the lens. Smile with your eyes. Bend one knee. Make triangles with your arms. Breathe normally. Wear comfortable clothes. Trust your photographer. Stop trying to be perfect. Practice these before your session. They become automatic within minutes.